


The content of this website may contain affiliate links and I may be compensated (at no cost to you!). Thank you so much for your support!
Are you using Facebook Business Manager yet? There’s an important change coming for all bloggers and online business owners who are using Facebook ads in their businesses. It’s especially important for anyone who has an email list!
In October 2018, Facebook released an important announcement in the form of a warning inside your Facebook ad account, in the Audiences tab section.

As of October 15, 2018, you’ll need to be connected to Business Manager in order to upload your email lists to create new audiences in the Ads Manager.
Then, starting October 31, 2018, if you want to use any audiences that were created from your email lists, that includes Custom audiences and Lookalike audiences, you’ll need to be connected to Business Manager.
What is the Facebook Business Manager?
Facebook Business Manager is a tool that helps you organize and manage your ad accounts and Pages. Think of it as a handy dashboard to manage and share your Facebook advertising assets and social media posts among multiple people and teams!
When you login to the Business Manager you immediately see your ad accounts and Pages. You can click the arrows next to each of those and see a snapshot of recent activity for that account.
Under Ad Accounts you can see active, scheduled, recently completed and inactive campaigns. Under Pages you can see recent posts along with reach, clicks and published dates. Clicking one of those links will take you to the actual post or ad.
The Facebook Business Manager is also where you can manage access to your account. It allows you to give others, like an ad agency, partner or staff member, access to your ad account without sharing login information.
The bottom line is that Facebook wants you to have a Business Manager account and connect your Facebook page! This is especially important if you have an ad account.
Setting up the Facebook Business Manager
Now that you know what the Business Manager for Facebook is, let’s get started using it. This guide will walk you through everything you need to know about the Facebook Business Manager!
I’m going to show you how to get set up with Facebook Business Manager as well as make good use of all its features. You’ll learn how it works to make the most out of this powerful tool.
Now head over to business.facebook.com so I can walk you through the process step-by-step.
Step 1: Explore Your Dashboard
When you login to Facebook Business Manager, your screen might look similar to this if you manage multiple ad accounts. (I have blocked out my clients ad account numbers to keep them private, but you get the idea of what it looks like.)

Or if you just have one business account and one business page it might look more like this:
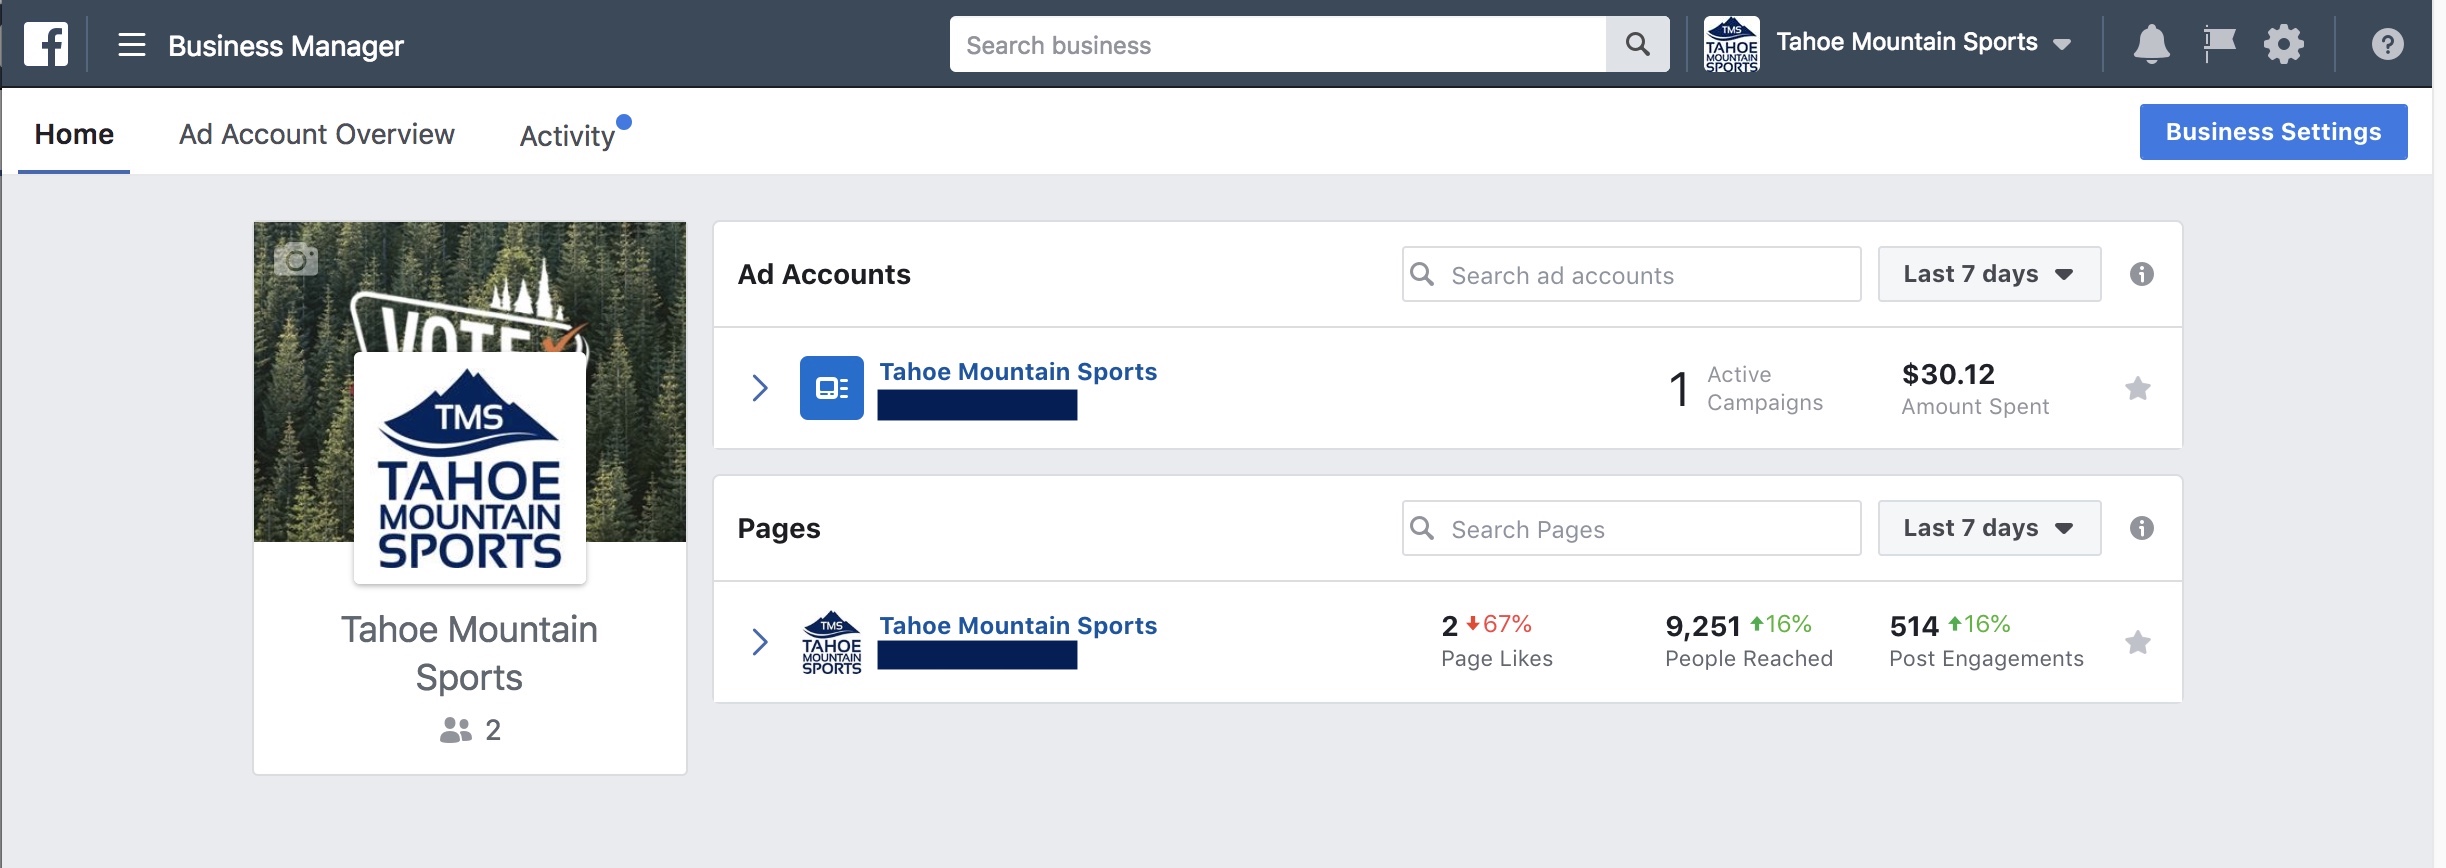
Feel free to explore your dashboard on this main page. If you click the arrow next to your ad account you’ll see your most recent Ad campaigns.
You can change the date range and see your campaigns for a different time period also. From there, you can click on any of the campaign name links to open the Ads Manager.
Step 2: Click On Business Manager Settings
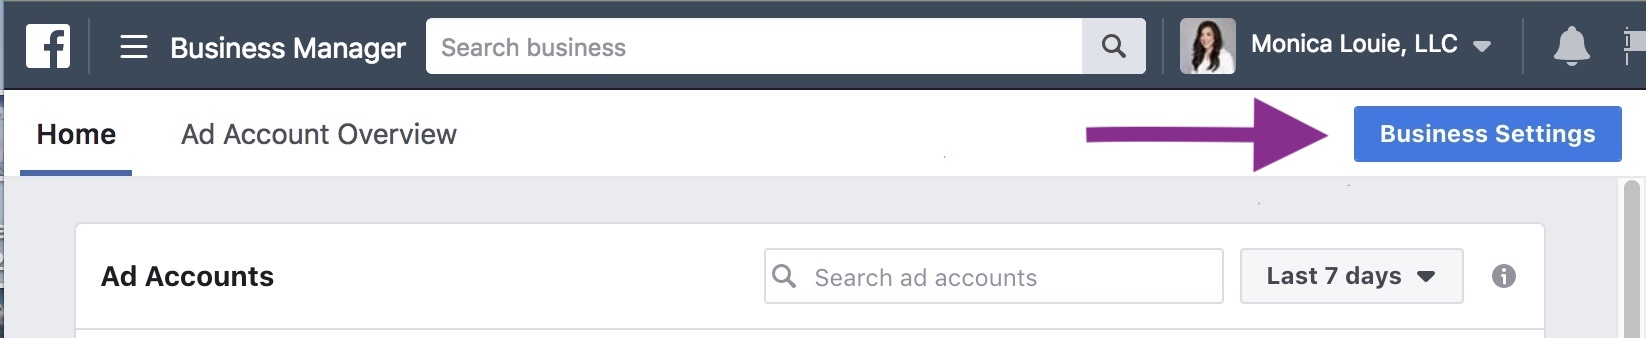
Next, you’ll want to look at your settings. Just go to business.facebook.com/settings, or from your home screen dashboard, click on the blue “Business Settings” button on the top right corner.
This will open the Business Manager Settings screen that looks like this:
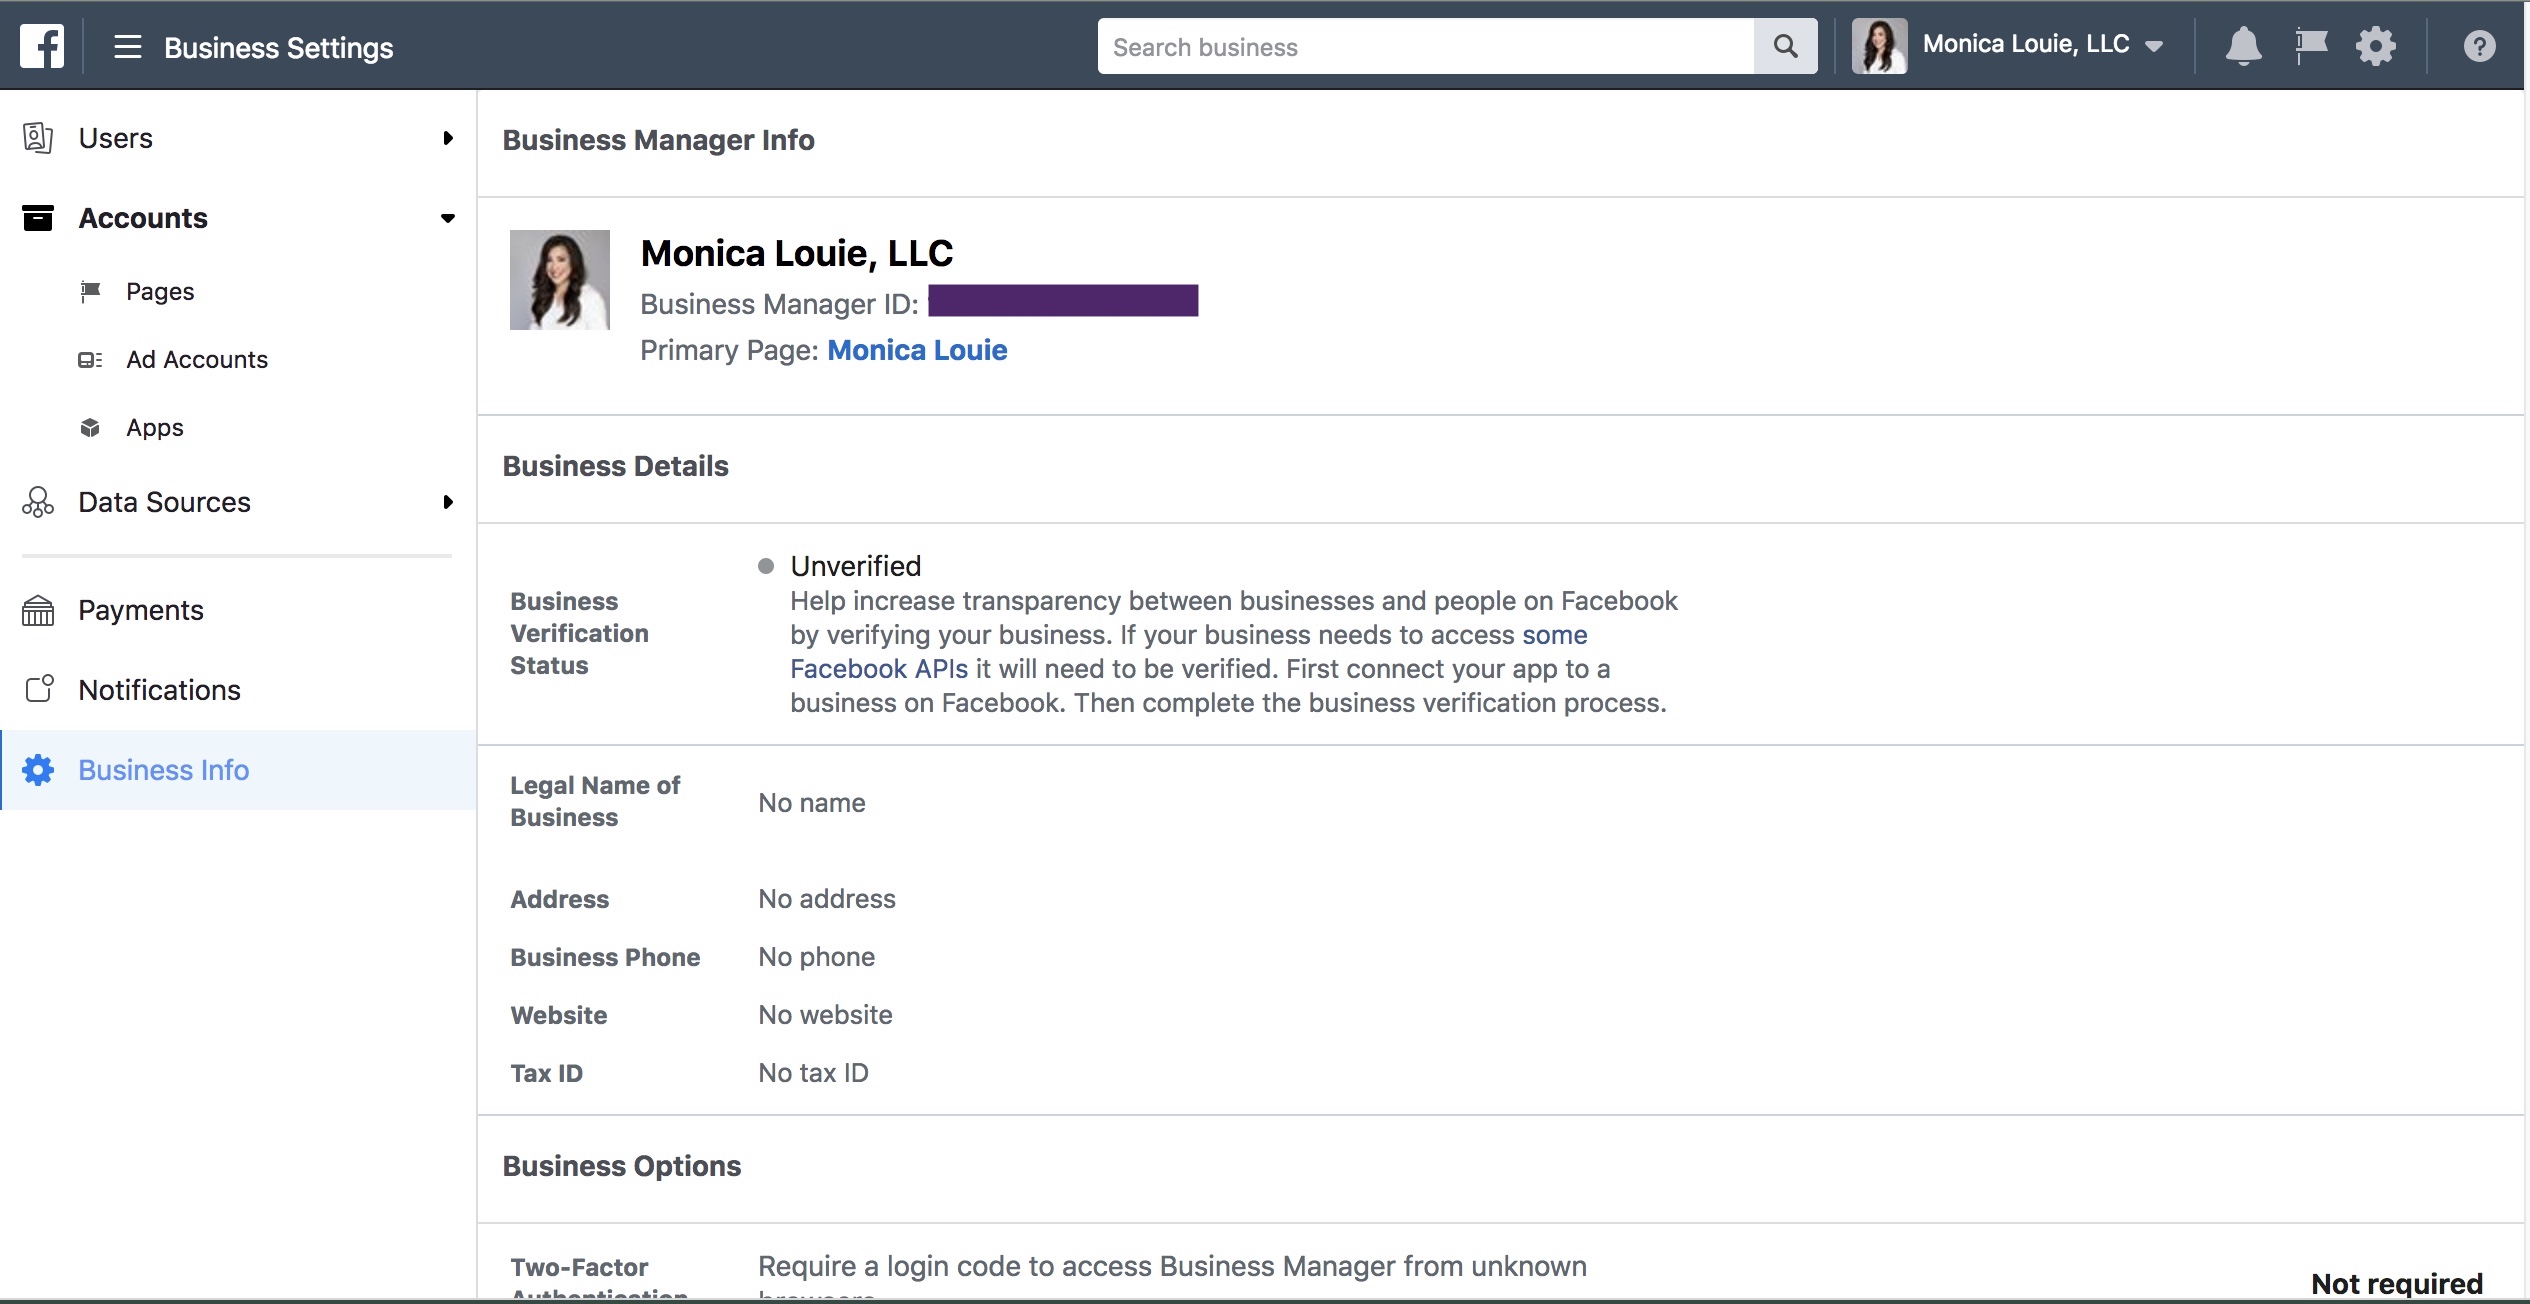
Confused yet? Don’t be! This is just the page that will allow you to set up and customize your pages, ad accounts, and the team members helping you manage your Facebook Business account.
We’ll dive into each of the settings more below.
Step 3: Choose the Setup Preferences
On the left side of the screen you’ll see a Setup Guide link, I had to scroll to the bottom of the menu to find it.

Click on it to open up the Setup Guide that resembles the image below.

The text at the top will tell you how you can use the Business Manager Setup Guide to get the most out of Business Manager.
There are instructions to help you request access to Pages or ad accounts, assign permissions to your team, and create new ad accounts.
As you scroll down, you’ll see more options.

If you have more than one business or manage additional Facebook Business Pages, you’ll definitely want to consider adding more than one account to the Facebook Business Manager tool.
Facebook explains most of this as you continue scrolling down.

3 Ways to Start Using Facebook Business Manager
Those are the 3 main steps you need to take to start using Facebook Business Manager. It’s important to take your time during the setup process and fully understand how everything works.
Below, I included some instructions to help you setup specific features like your ad accounts, pages, people, and payments.
1. Ad Accounts
In the ad accounts section, you can claim an ad account, request access to an ad account, or create a new ad account.

To claim an Ad Account, which is super important to do before October 31, 2018 so you don’t lose access to your audiences created from email lists, click the “Claim Ad Account” button and this screen will appear:

Next, you need to find the Ad Account ID in Ads Manager (www.facebook.com/ads/manager). It’s the number in parentheses next to the name of the Ad Account.
Enter the Ad Account ID in the “Claim An Ad Account” screen, and follow the prompts to claim the ad account. Click “OK” to finish the process. Once you’ve submitted your request, it will be pending for the admin’s approval.
2. Business Pages
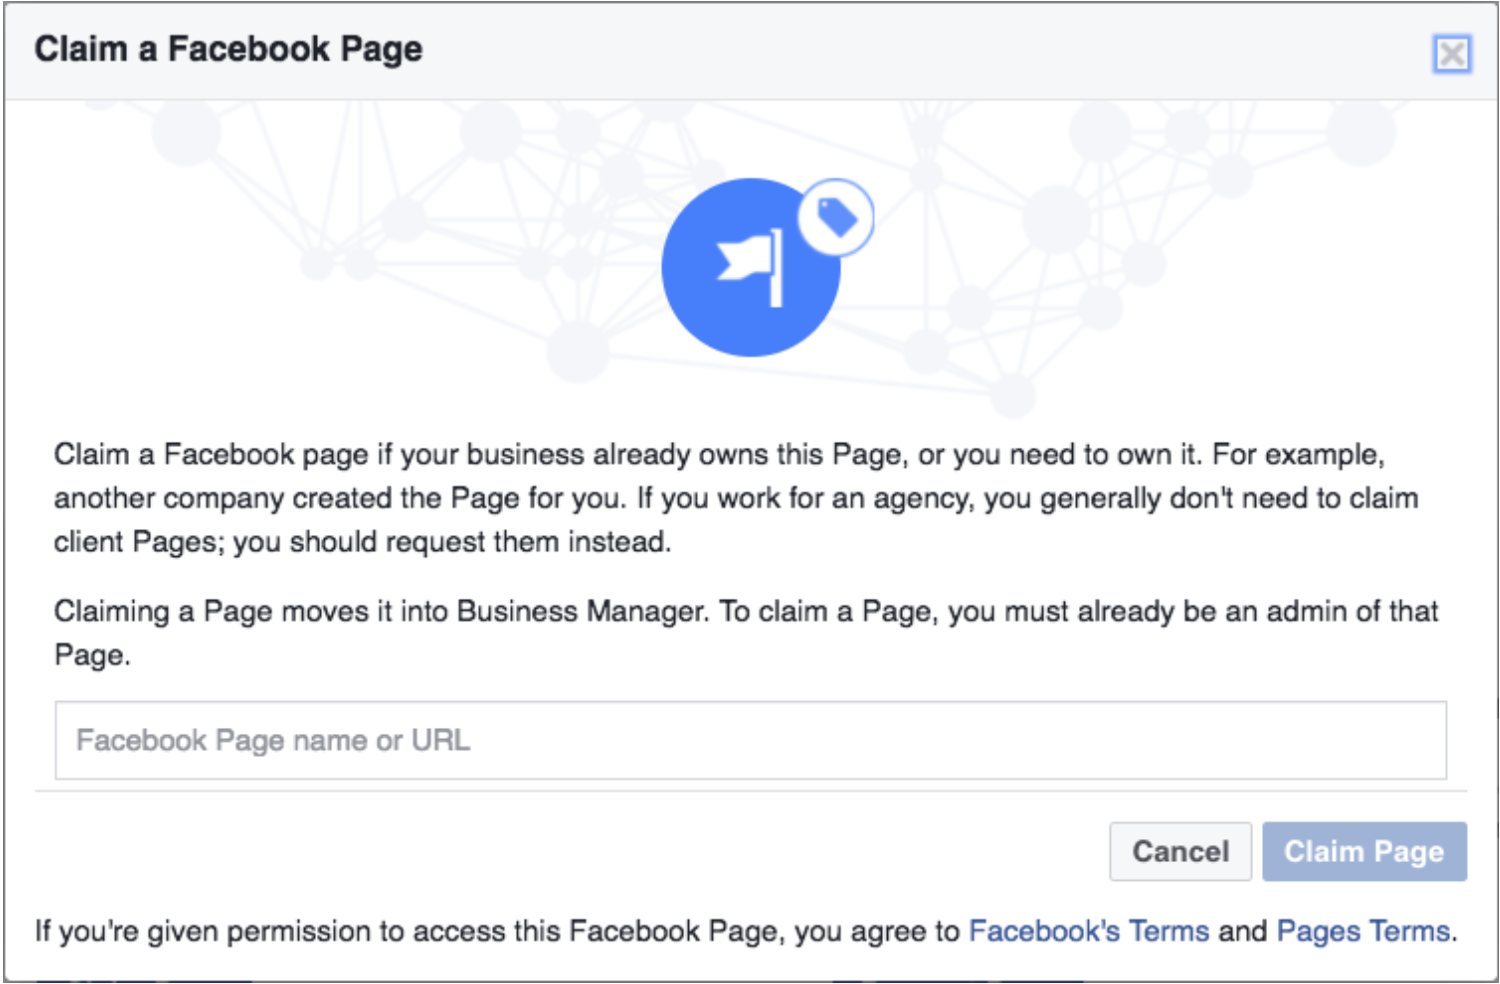
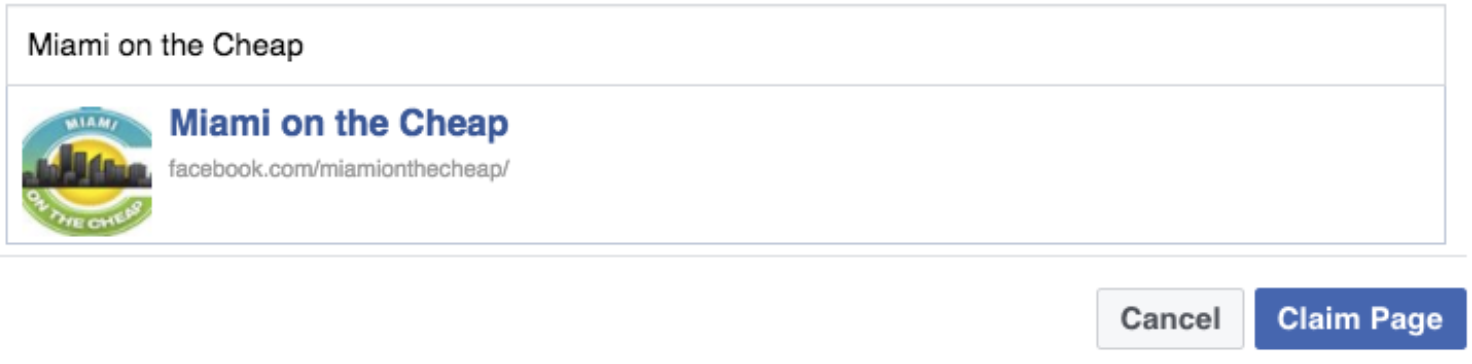
In the Pages section, you can claim a Page, request access to a Page, or create a Page.

To claim a Page, click the “Claim Page” button, and the following screen will appear.
Begin typing the name of the Facebook Page in the box, options will appear:
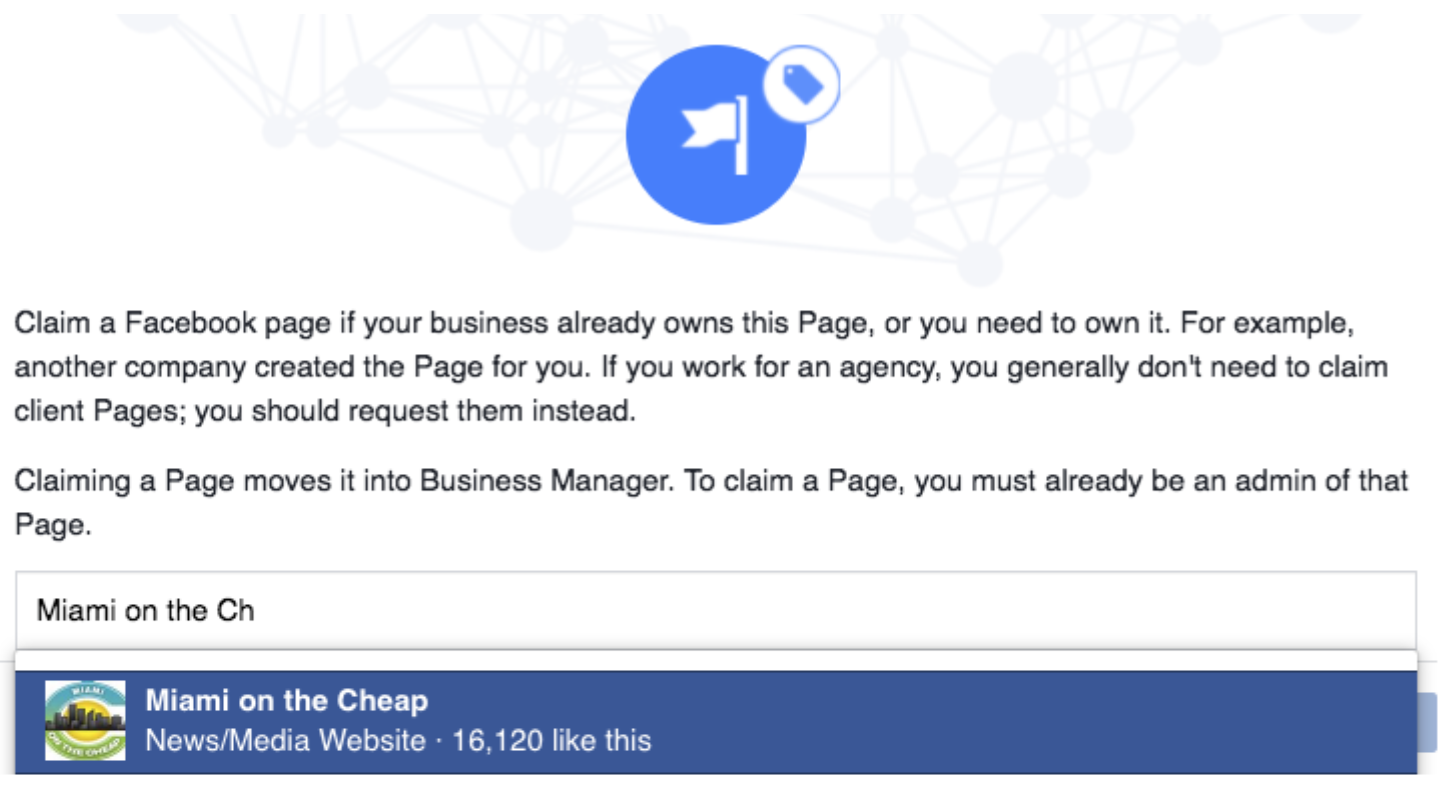
Click on the Facebook Page name, and follow the prompts to claim the Page.
3. Team Members and Admins
In the people section of the Facebook Business Manager, you can add an Admin or add an Employee to help manage the page.

To add an Admin, click the “Add Admin” button, and the following screen will appear:
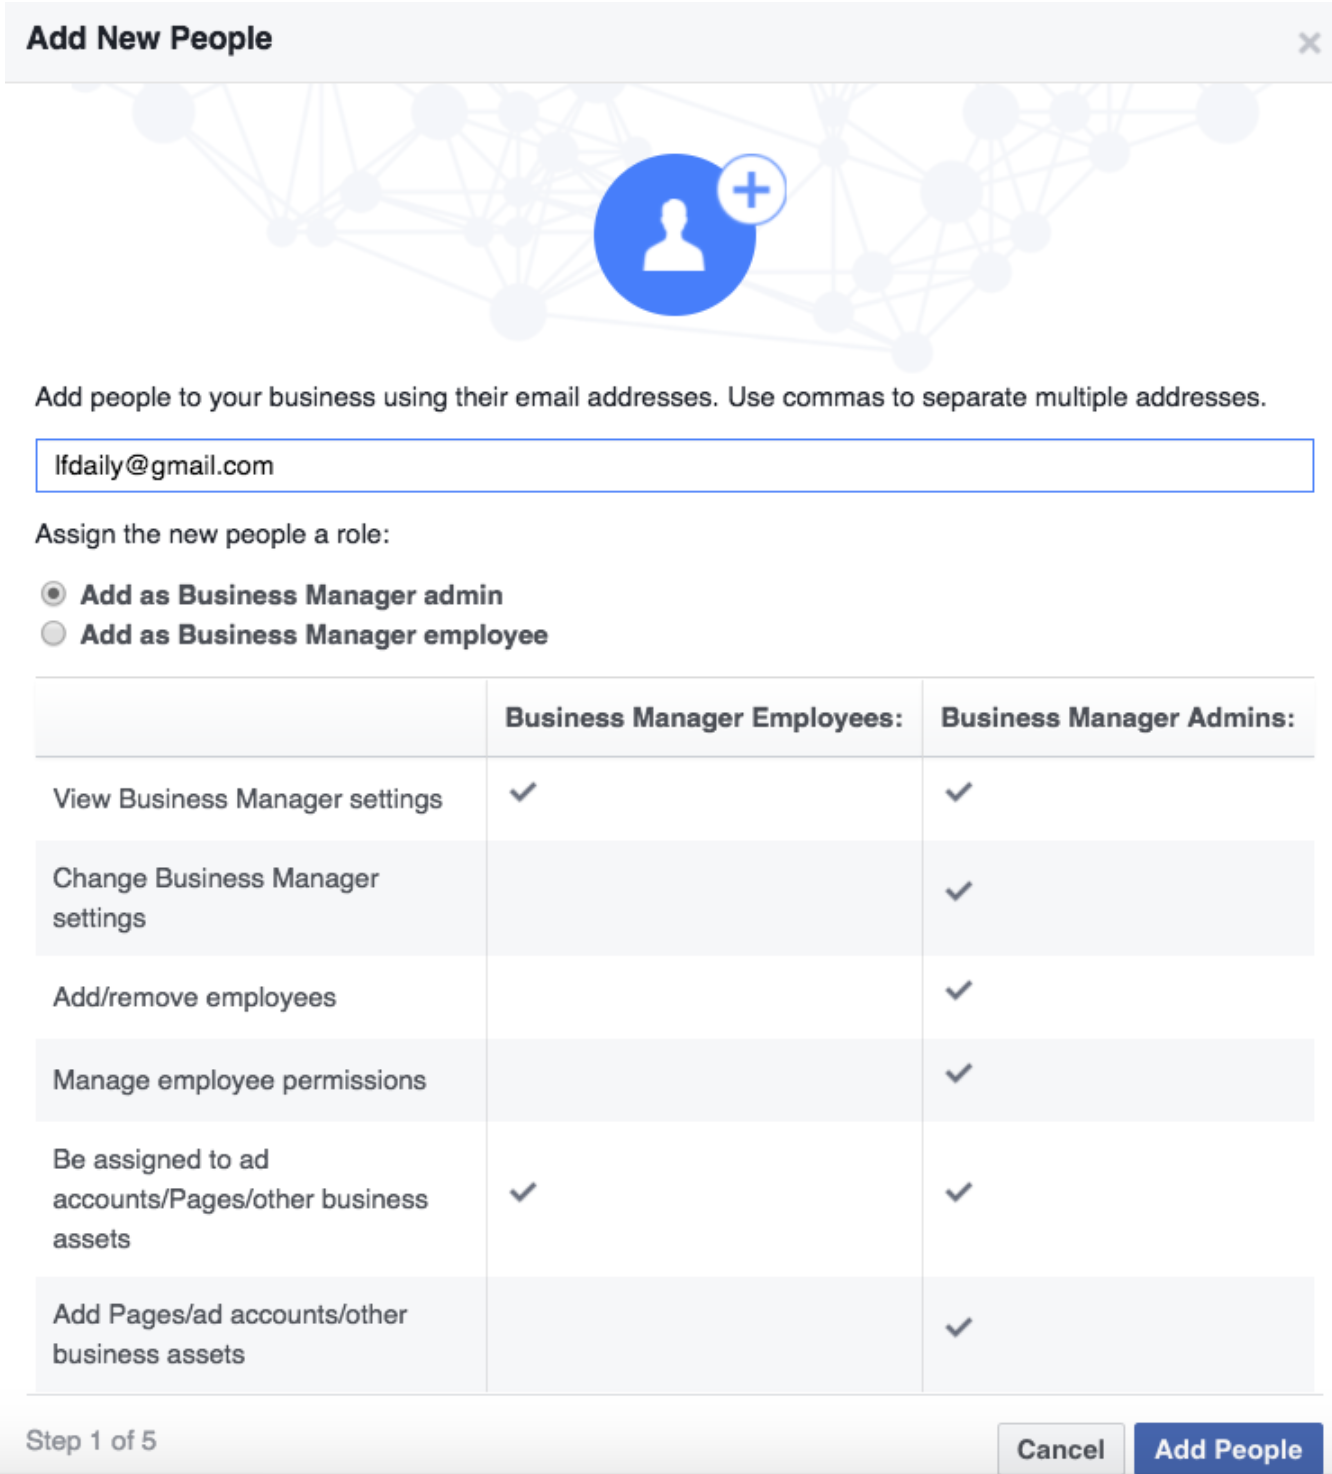
Enter the email address of the person you wish to add, and assign the role of Business Manager Admin or Business Manager Employee, as shown above.
Note: this email address needs to be the address you use for your Facebook account! If you try to add them with an email address that’s not associated with your Facebook account, it won’t work!
Click the “Add People” button to continue, and the next screen will appear.
On the next screen, you’ll have the option to assign Pages to the person or people you wish to add.
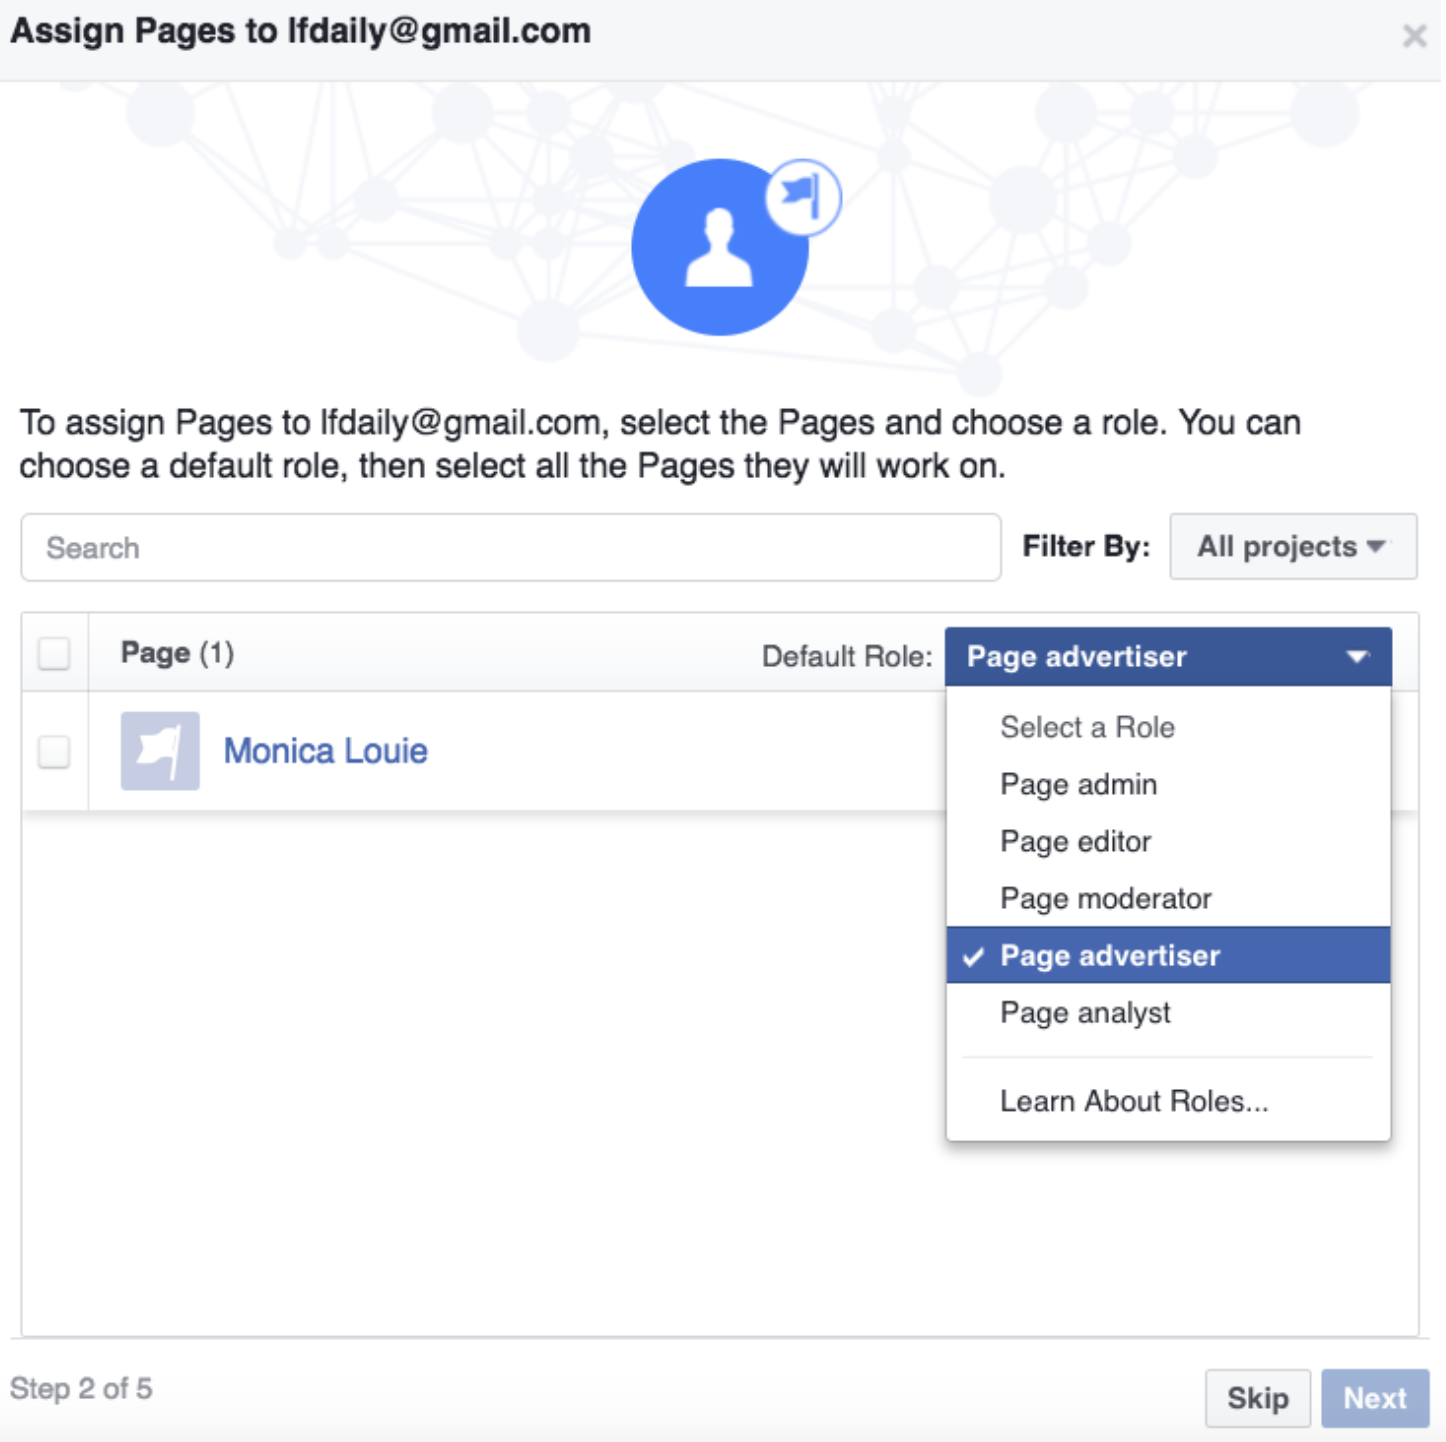
Click the box to the left of each Page you wish to assign. Select a Default Role by clicking the Default Role drop-down menu, as shown below. Click the “Next” button to continue.
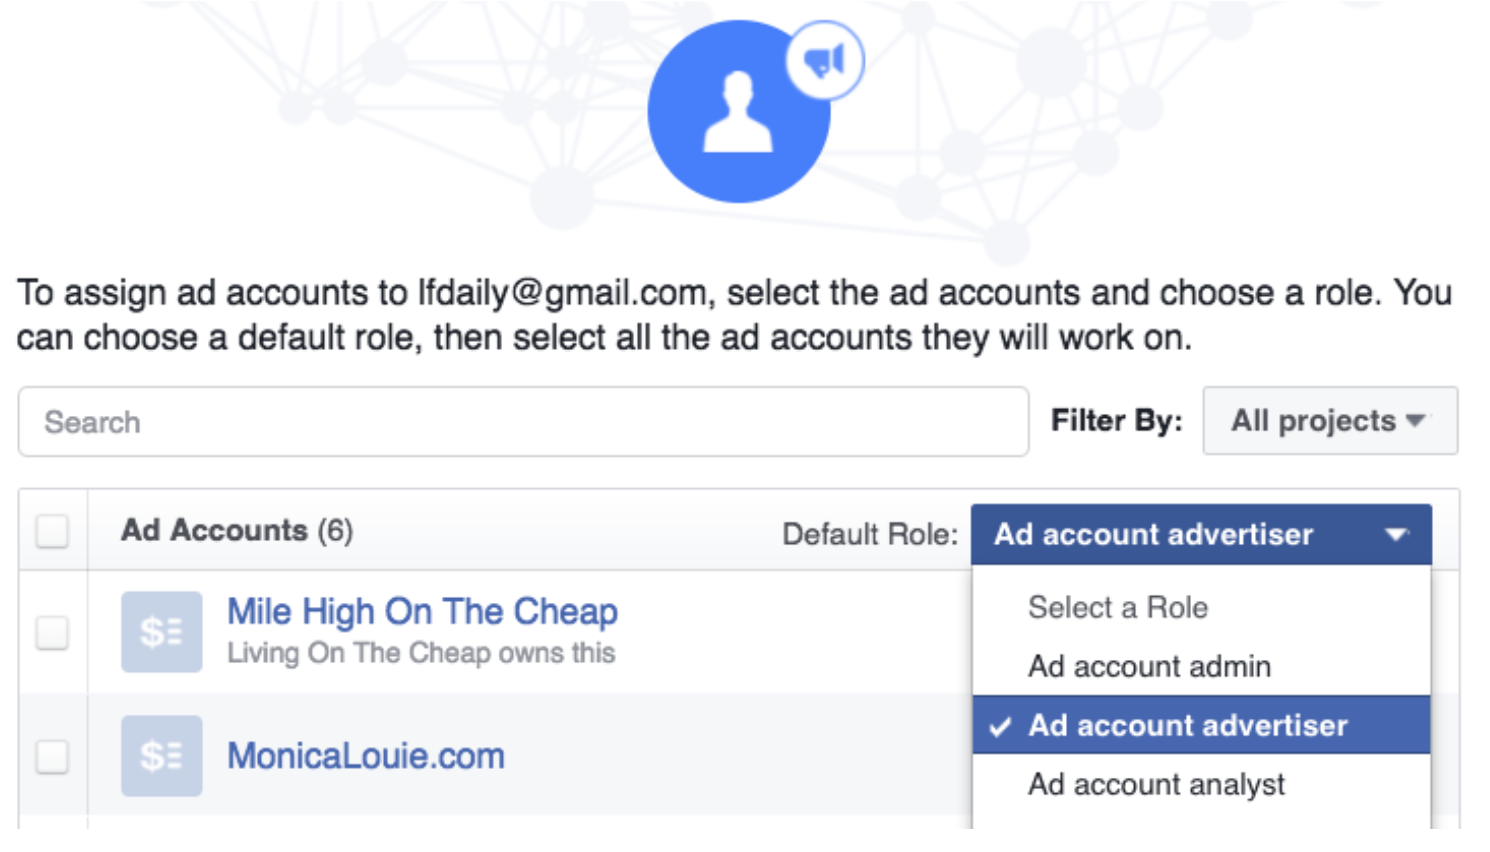
On the next screen, you’ll have the option to assign ad accounts to the person or people you wish to add.

Click the box to the left of each ad account you wish to assign. Select a Default Role by clicking the Default Role drop-down menu, as shown below. Click the “Next” button and follow the prompts to complete the process.
Billing and Payment Methods
Now that you’ve got everything set up, it’s time to learn how billing and payments work.
From the Business Manager Settings screen, click on Payments in the menu on the left to update the payment methods.

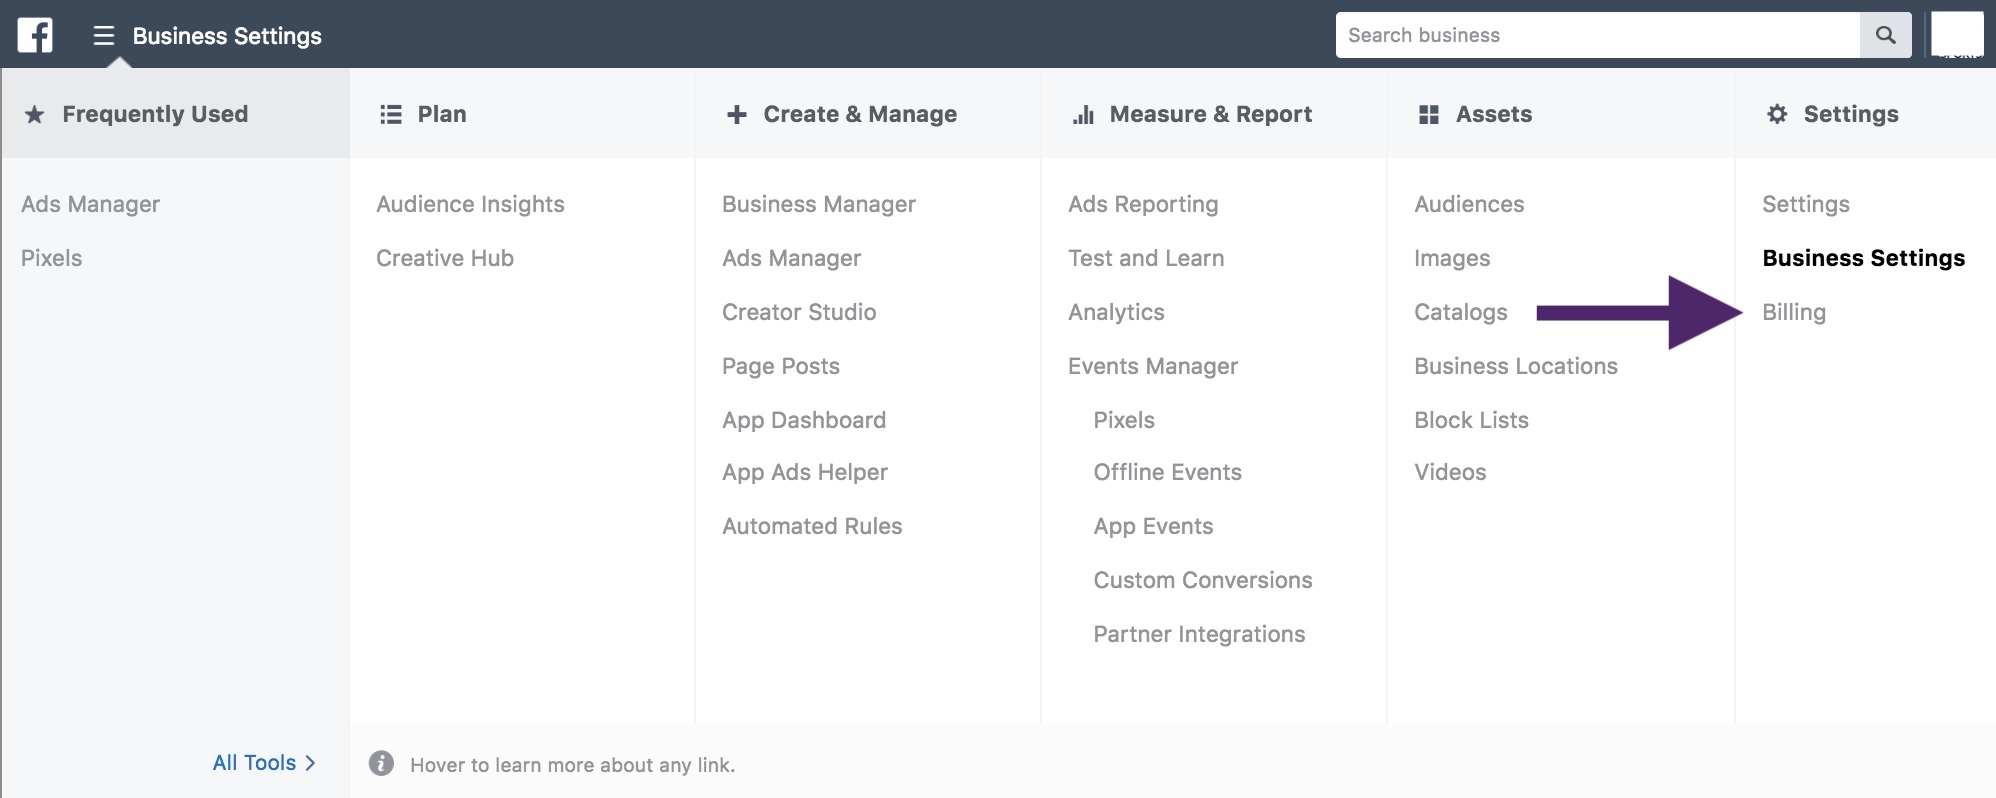
Alternatively, you can update the Billing and Payment Methods for each ad account by opening the hamburger menu next to Business Settings.
Click All Tools to open the full menu, and select “Billing” under “Settings” in the far right column.
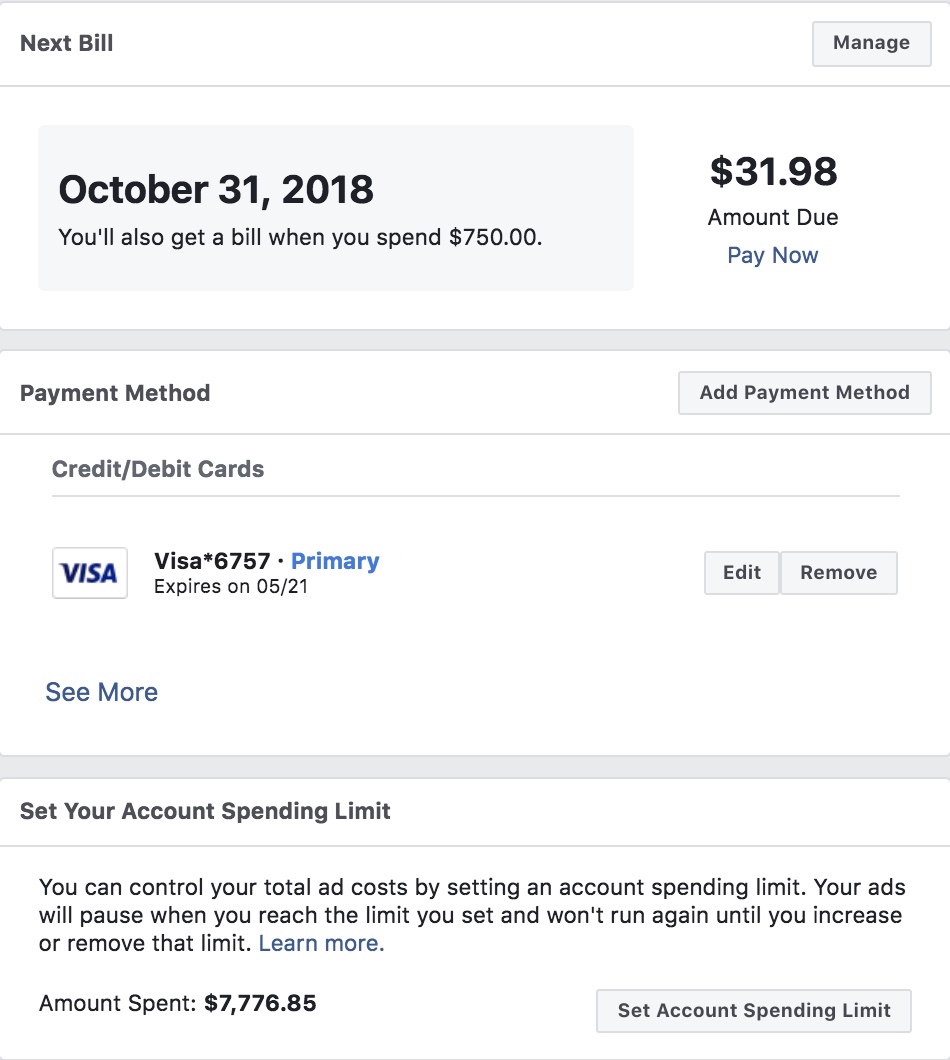
This will take you to the Billing screen.
On the right, you will see the Payment Settings. Click it to edit the payment methods and see all of your billing information.
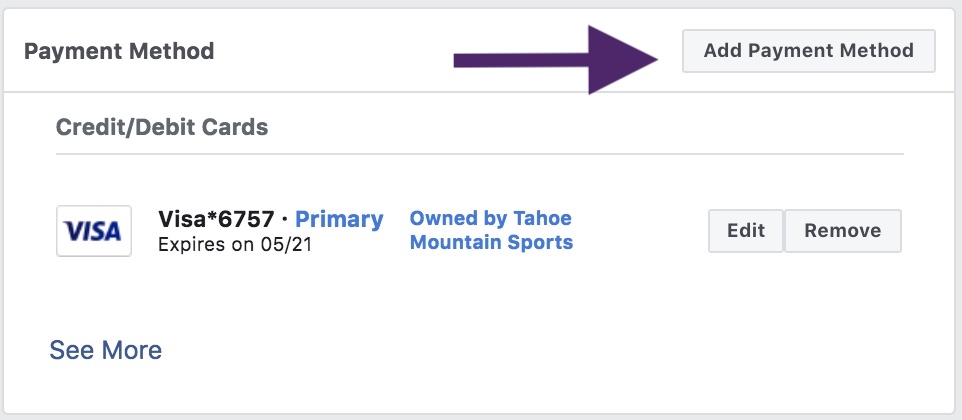
Here you can add a new payment method and edit or remove an existing payment method by selecting any of those options.
Benefits to Using Facebook Business Manager
Using the Facebook Business Manager isn’t mandatory for managing your Business Page or ad account. But it’s getting closer with the newest change requiring you to connect to your Page to it in order to continue using Audiences created from your emails lists!
Plus, there are a lot of benefits of using Facebook Business Manager instead of having everything under your personal Facebook account.
1. Helps with Work Life Balance
One of the biggest benefits I’ve seen by using Facebook Business Manager is that it helps me balance my work and life.
Since Facebook is obviously a large part of my business, I spend a ton of time on the platform! This makes it easy for work and life to become blurred.
To separate business notifications from my personal notifications from friends and family, I use the Facebook Business Manager. This way all of the notifications related to my Page and ads, as well as my clients’ Pages and ads, show up in Facebook Business Manager instead of on my regular News Feed.
This makes it easier for me to have family time and not worry about my phone blowing up with Facebook notifications 24/7! 😊
2. Provides Security as You Grow Your Team
Another benefit of Facebook Business Manager is that it provides additional security for my business, as well as my clients’ businesses. As mentioned above, Facebook Business Manager gives you the ability to grant access to certain team members for specific pages and ad accounts.
This means that as my team grows, each person only has access to the accounts they need to complete their work, rather than having access to the pages and ad accounts for every client I work with.
3. Gives You the Ability to Have Multiple Ad Accounts
Earlier in this post I showed you how Facebook Business Manager allows you to have multiple ad accounts for your business, however I didn’t yet tell you the benefit of doing so.
For one, having multiple ad accounts can help you separate campaigns for your various team members.
For example, part of the hiring process for my team is to have new members create, run, and test a Facebook ad campaign so we can see the level of their knowledge. For this test, we create separate ad accounts so they can’t see what the other team members are testing.
Secondly, having multiple ad accounts can be helpful if your ad account ever gets shut down. It’s unfortunate whenever your ad account gets shut down for an unknown reason. But, having an additional ad account can be a great short-term work-around for this problem.
Just be careful about running risky ads that could cause you to get multiple ad accounts shut down, as eventually you won’t be able to create another one.
Getting Started with Facebook Business Manager
Facebook Business Manager is the general hub for managing your business page and Facebook ad accounts effectively. And this tool keeps getting updated to become more user-friendly!
Use it to manage multiple Pages from a single location, onboard team members, and manage multiple ad accounts from one source. It’s quite revolutionary and you don’t want to miss out on the opportunity to grow your business with such a cutting edge tool!
Need to learn more about Facebook ads specifically so you can manage them with this tool?


")


Comments